How to Replace a Sprinkler Head Nozzle
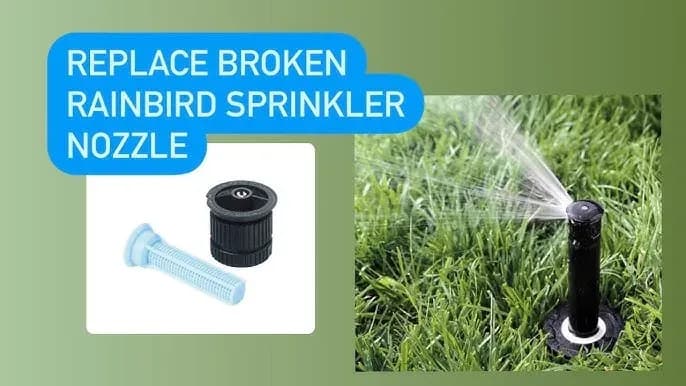
Summary: Replacing a sprinkler head nozzle means removing a worn, clogged, or damaged spray outlet and fitting a new nozzle with the same pattern, radius, and flow characteristics. The nozzle may be small, but it controls where water lands, how evenly the zone applies water, and whether the sprinkler throws mist or runoff instead of useful coverage. Poor irrigation maintenance can waste up to half of outdoor water use, so a clean, correctly matched nozzle is a simple way to recover pressure, restore coverage, and reduce dry spots. Because every head in the same zone shares one runtime, one bad nozzle can upset the whole pattern.
When a sprinkler nozzle needs replacement
A sprinkler nozzle should be replaced when the spray pattern is distorted, the edge of the pattern no longer reaches the intended area, or the nozzle body is cracked. Clogging can sometimes be solved by cleaning, but physical damage, worn ribs, and repeated debris blockage usually call for replacement. A mower strike, soil intrusion, or old filter screen can all create the same symptom: weak or uneven spray.
The nozzle is separate from the sprinkler body. If the pop-up stem still rises and retracts smoothly, the repair usually does not require replacing the entire head. For broader system context, read the sprinkler system components guide.
Tools and parts for sprinkler nozzle replacement
- Replacement nozzle with matching arc, radius, and flow rate
- Small flat-head screwdriver or pop-up pull-up tool
- Locking pliers or a sprinkler stem holder
- Clean filter screen supplied with the nozzle
- Flush cap, if the head design supports one
- Gloves and a small brush for cleaning grit from the body
How to replace a sprinkler head nozzle in 5 steps
Step 1: Shut off the irrigation zone
Turn the controller off and make sure the zone is not pressurized. Working on an active sprinkler head sends soil into the riser and can damage the threads. If the system recently ran, wait until pressure bleeds down before lifting the stem.
Step 2: Pull up and secure the pop-up stem
Use a pull-up tool or a flat screwdriver under the nozzle lip to raise the stem. Hold the stem with locking pliers at the base, using light pressure so you do not crush the plastic. The stem must stay raised while you remove the nozzle and filter.
Step 3: Remove the old nozzle and screen
Turn the ribbed nozzle counterclockwise until it releases. Lift out the filter screen underneath and inspect it for sand, algae, or mineral scale. If the screen is clogged but the nozzle is intact, cleaning may solve the problem; if the nozzle is chipped or worn, replace it.
Step 4: Flush the sprinkler body before installing the new nozzle
Install a flush cap if available, or briefly run the zone with the nozzle removed while controlling the stem. The goal is to push soil and debris out before the new screen goes in. If dirty water repeats, inspect upstream filtration at the zone head or review irrigation filtration products.
Step 5: Install, align, and test the new nozzle
Insert the clean filter screen, thread the new nozzle on by hand, and align the spray edge to the landscape boundary. Run the zone and adjust arc or radius according to the nozzle design. A correct replacement produces an even fan without misting, sputtering, or overspray onto pavement.
Clean or replace: sprinkler nozzle decision table
| Condition | Best action | Pros | Cons | Best suited for |
|---|---|---|---|---|
| Minor sediment in screen | Clean screen and flush head | Fast, no new part needed | Does not solve worn nozzle edges | Best suited for homeowners doing seasonal tune-ups |
| Cracked or chipped nozzle | Replace nozzle and screen | Restores spray pattern accurately | Requires matching arc and radius | Best suited for landscape contractors and turf managers |
| Stem will not rise or retract | Replace full sprinkler head | Solves body, seal, and riser failure | More digging and alignment work | Best suited for older systems with repeated head failures |
How to choose the right replacement nozzle
Match the old nozzle by arc, radius, precipitation rate, and thread style. Arc describes the angle of coverage, such as quarter circle, half circle, or full circle. Radius describes throw distance, while precipitation rate tells how quickly water is applied to the zone.
Do not mix high-flow and low-flow nozzles in the same zone unless the design accounts for it. Mismatched nozzles make one area flood while another stays dry. For greenhouse or nursery applications that need smaller droplet coverage, compare micro sprinkler products and the micro sprinkler spacing guide.
Common sprinkler nozzle replacement mistakes
- Replacing the nozzle without flushing the body first.
- Installing a different arc or radius than the zone was designed for.
- Over-tightening the nozzle and damaging plastic threads.
- Leaving the filter screen out because it clogged once.
- Adjusting radius too far down and creating poor distribution.
Bottom line
A sprinkler head nozzle replacement is a small repair with a large effect on coverage quality. Shut the zone off, secure the pop-up stem, remove the old nozzle and screen, flush debris, and install a matching replacement. Expert advice: replace nozzles by zone rather than one at a time when patterns no longer match; this keeps precipitation rates consistent and simplifies scheduling. For related components, browse sprinklers, sprinkler sets, and irrigation valves.